
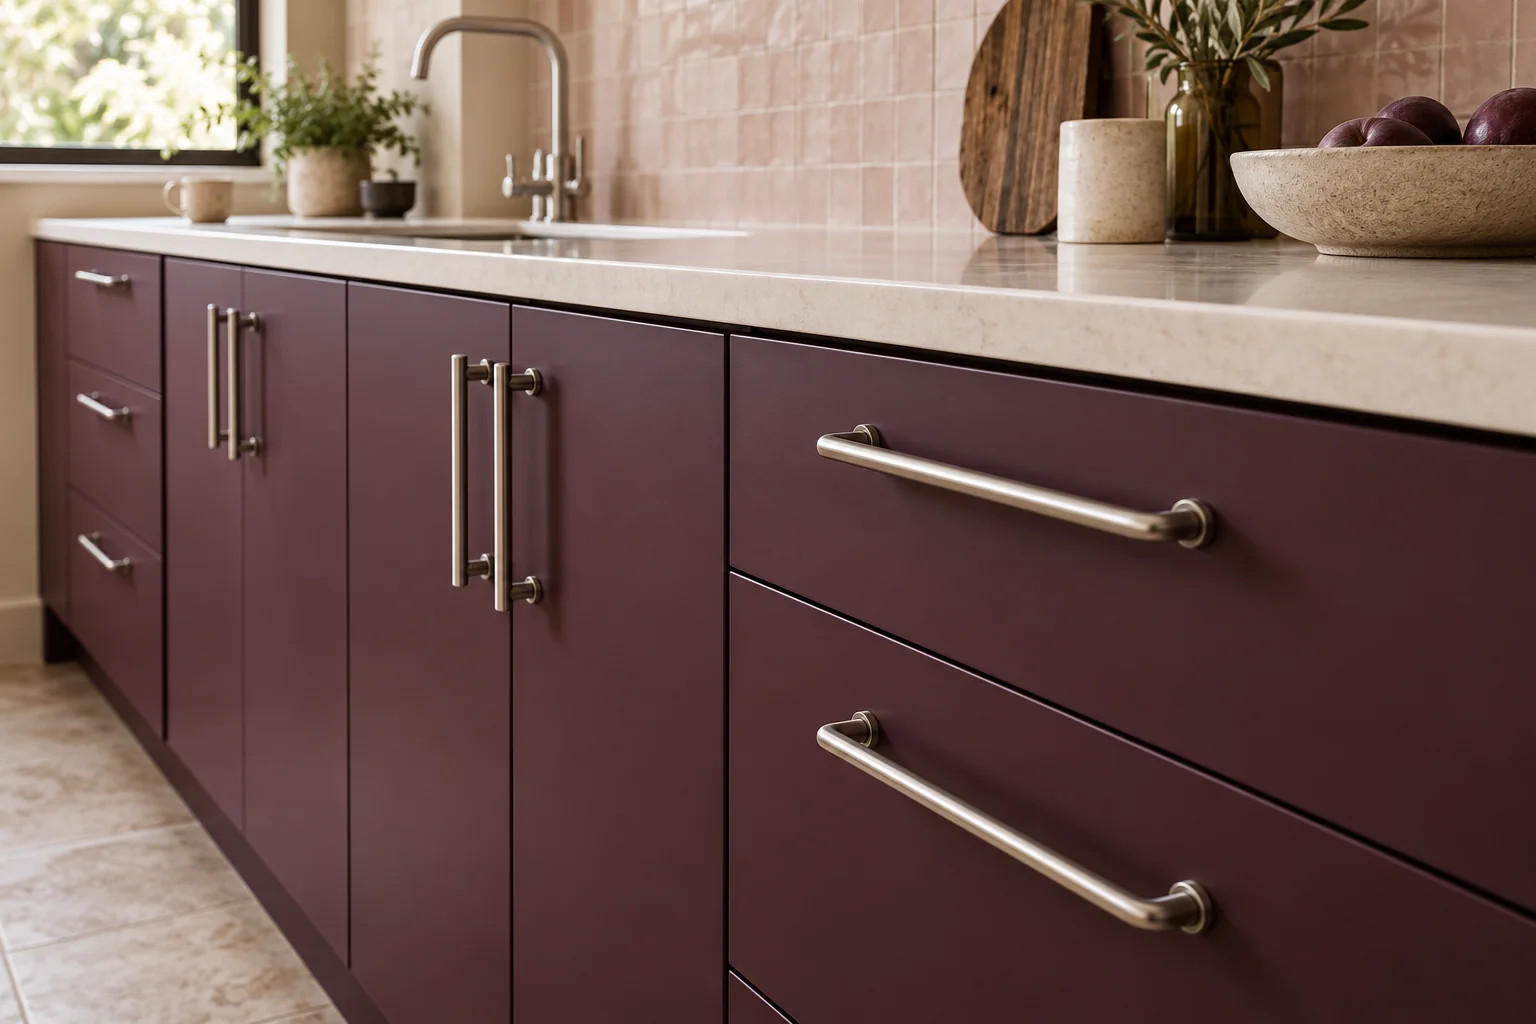
Choose kitchen handles by testing the grip, checking the fixing dimensions and looking at them on the actual door style. Colour matters, but a handle also needs to feel comfortable and sit well across both cupboard doors and drawer fronts.
For a revival with new fronts, decide the handle arrangement before the fronts are drilled. Treat online images as a shortlist, then confirm samples, compatibility and the exact items included with the team.
Start with how the handle feels
Knobs offer a compact point to grasp. Bar and D-shaped pulls provide a longer grip area. Cup pulls and edge pulls feel different again, so avoid choosing from appearance alone if you can try a sample.
Check whether you can comfortably get your fingers behind or around the handle. Try the movement you would use to open a cupboard and a drawer. If anyone in the household finds small knobs awkward, make that part of the brief rather than leaving it until installation.
A longer handle is not automatically more comfortable: its projection, shape and clearance also matter. Ask for a sample or demonstration that represents the proposed fitting, especially if ease of use is one of your reasons for updating the kitchen.
Hole spacing is different from overall length
For a handle with two fixing points, hole spacing is the distance between the centres of the fixing holes. Overall length is the end-to-end dimension. Two handles can look similar in a photograph but have different fixing dimensions.
As a manufacturer example, Häfele’s H2360 handle listing provides hole-spacing options as part of its product information. This illustrates the specification to check; it is not a recommendation of that product or a claim that Kitchen Revival supplies it.
If existing fronts are being retained, matching the existing fixing pattern is a separate issue from finding a shape you like. If the fronts are new, the team still needs the chosen handle specification and agreed positions before drilling. Do not assume that an existing handle or screw will suit a new front.
Record the exact product reference, finish, size and fixing details in the agreed selection. A description such as “silver bar handle” is too vague to distinguish several similar products.
Look at doors and drawers together
A kitchen often combines tall doors, small doors and wide drawers. View the proposed handle arrangement as a complete run instead of selecting each front in isolation.
- Flat fronts: the handle becomes a prominent detail against a plain face.
- Framed fronts: consider how the fixing position relates to the frame and centre panel.
- Wide drawers: ask how the proposed handle size and placement will look and operate.
- Adjacent fronts: check the visual alignment and whether handles could meet neighbouring doors or surfaces as they open.
These are design questions to resolve with the team, not universal installation rules. The slab, shaker and fluted door guide can help you discuss the relationship between the front profile and its hardware.
Compare finishes in your kitchen’s light
Place a handle sample beside the proposed door finish and the surfaces you are keeping. Look at the combination in daylight and under the room’s evening lighting. Compare it with the tap and visible appliances without assuming every metal needs to be identical.
For a quieter effect, you might prefer a handle that sits close to the cabinetry colour. For a more pronounced detail, compare a contrasting finish. These are visual choices, not claims that one combination is more durable or suitable for every kitchen.
Ask what the finish actually is and request its care instructions. Terms such as “brass colour” or “stainless look” do not by themselves establish the underlying material or its performance. For homes exposed to salty air, ask about the specific product’s suitability rather than treating a coastal style as a durability specification.
Try a small shortlist before committing
Limit the first comparison to a few candidates. Hold each against a sample front or use a temporary visual mock-up agreed with the team; do not drill trial holes in finished fronts. Step back to see the whole arrangement, then come closer to test the grip.
Check protruding ends and corners as well as the main grip. Think about the route past the cabinets and how you use the kitchen. Note any concern about snagging clothing or reaching around a handle so it can be assessed before the final choice.
If you want different handles on cupboards and drawers, ask for a drawing or clear selection list showing where each goes. Combining shapes can be intentional, but an ambiguous order can produce an accidental mix.
Confirm the selection as part of the revival
Your final record should identify the handle, finish, size, quantity, positions and any exceptions. Ask who verifies fixing compatibility and when the choice becomes final for production or installation.
Kitchen Revival includes updated handles within its coordinated makeover approach alongside replacement fronts and assessed benchtop overlays. Do not assume a standalone hardware shop or handle-only installation service. If that is all you need, state it clearly when asking about scope.
Our makeover cost-factor guide helps you compare what a proposal includes. When you are ready, tell Kitchen Revival about your preferred handles and new fronts, including any practical grip or access needs you want the finished kitchen to address.
Written with AI assistance for Kitchen Revival’s homeowner guides. General planning information; your kitchen and the proposed products need individual assessment. No supplier relationship is implied by the references above.
Your kitchen. Its next chapter.
Tell us what works and what you’d love to change.
Explore your kitchen revival